
Practical guide / Roof bars and compatibility
Fixed-Point Roof Bars: Finding the Correct Mounts and Fitting Kit
Find and verify factory roof mounting points. Check the exact fixed-point feet, vehicle kit, crossbars, spacing and condition before ordering a system.
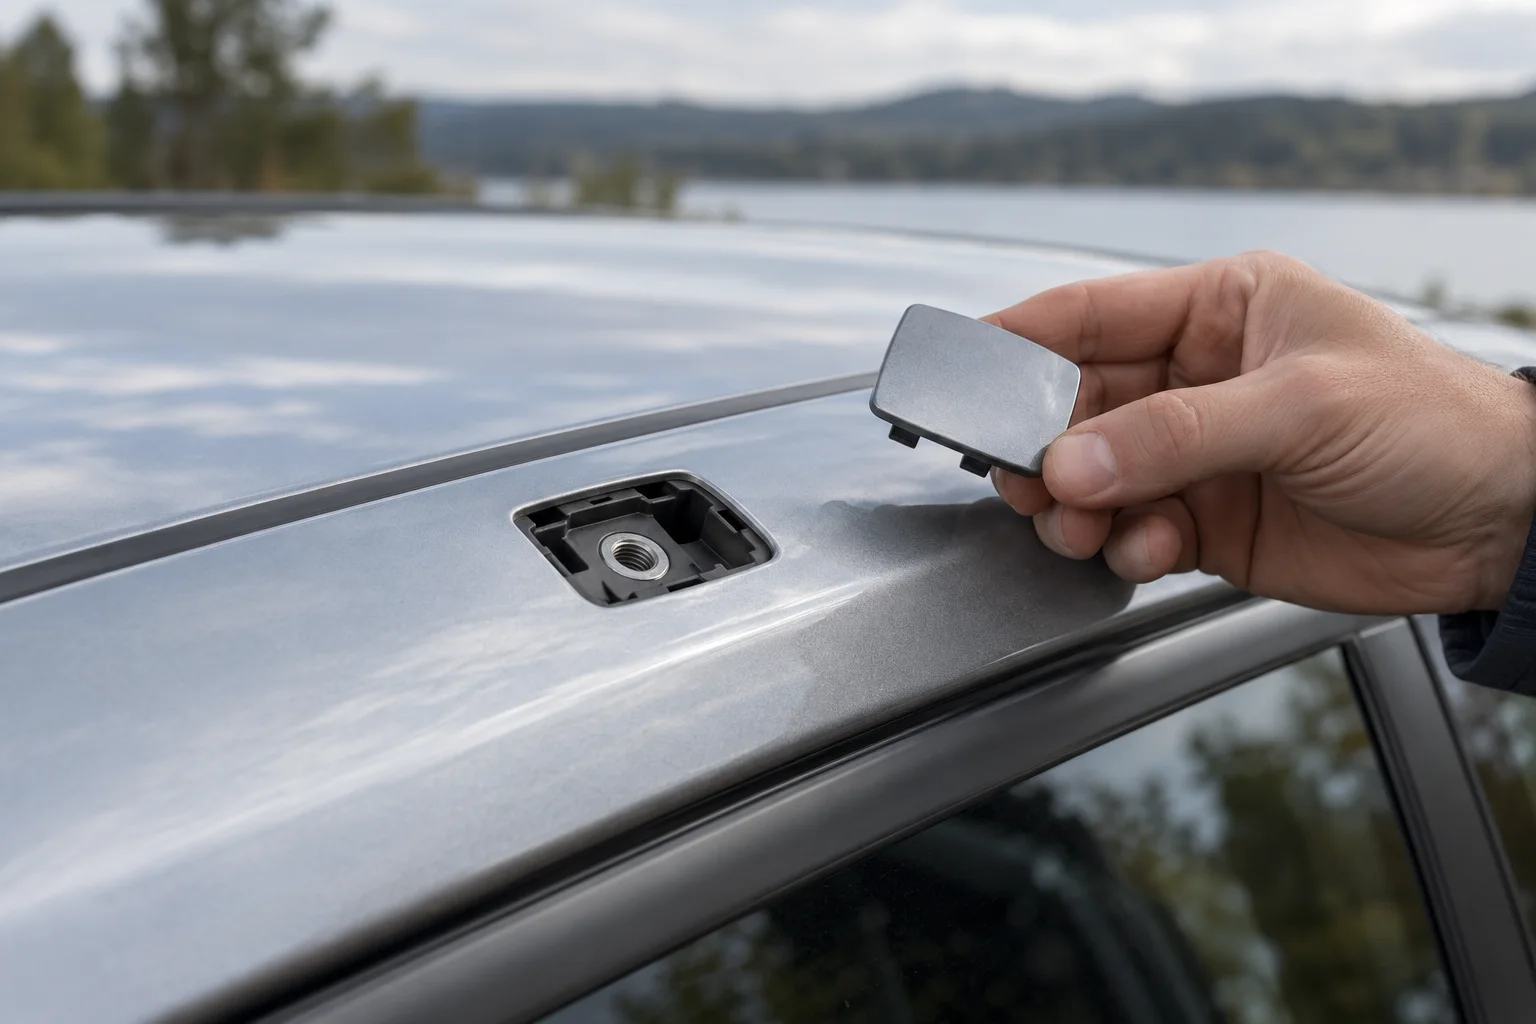
The mount belongs to the vehicle
A fixed-point rack uses designated factory attachment locations and the exact approved feet, vehicle kit and bars. Finding a threaded hole is only the start: its location, hardware, condition and fitting instructions must all match the approved system.
Confirm the mounting locations in the handbook
Look up the vehicle’s roof-carrier section before removing any trim. Factory points may sit beneath covers, but a small roof flap is not automatically a rack mount. The handbook should establish which locations are intended for carrying equipment and how access is obtained.
Record the exact body, generation, year and roof option. A fixed-point fit for one version of a car may not apply to another with rails or a different glass roof. If you bought the car used, establish whether any attachment parts have been changed or added. The rack maker’s recommendation normally assumes the specified vehicle configuration.
Use the approved access method and keep the covers safe. Do not lever out unrelated trim, puncture sealing material or drill because the expected point is not immediately visible. If the handbook and actual roof do not agree, ask the vehicle maker or a competent fitting specialist to identify the arrangement before buying hardware.
Separate the vehicle point from the foot and kit
The factory point is part of the car. The vehicle fitting kit supplies the specified interface, potentially including fasteners, spacers or bases. The feet support the crossbars and connect through that kit. Each part has a defined job; a bolt of the same apparent diameter cannot replace the complete interface.
The word “fixed-point” describes a category of attachment, not a single bolt standard. Thread pitch, engagement, seating, sealing and load transfer all matter. Reusing old fasteners or choosing replacements from a general hardware kit needs express manufacturer approval, not a judgement that the screw seems to tighten.
Obtain the complete vehicle-specific parts list
Use the rack manufacturer’s selector with the exact vehicle and roof configuration. Save the bar model and length, foot code, fitting-kit number and any restrictions. Download the kit instructions as well as the general foot booklet. The vehicle-specific drawing can contain information that is absent from the general assembly guide.
Compare the retailer’s contents against that list line by line. Check quantities, supplied locks and any covers or accessories that are optional rather than structural. A product title containing the vehicle name may describe only a kit, not the complete rack. A foot pack without its required interface remains an incomplete purchase.
If the selector offers multiple approved bar families, compare the whole combinations. Do not take the feet from one result and the bars from another merely because they share a brand. A different generation can have a different interface. The system buying guide helps organise the complete basket.
Inspect the points before applying load
Once the documented locations are accessible, inspect them in accordance with the vehicle instructions. Look for obvious damage, corrosion, debris, missing parts or signs of an earlier repair. Keep the surrounding paint and sealing surfaces protected during the inspection.
If a thread feels obstructed or a fastener does not seat as the instructions show, stop. Do not solve that uncertainty by applying more torque, fitting a longer bolt or re-cutting the thread. The point needs assessment through the vehicle maker or an appropriately qualified specialist. A rack can look level while its connection underneath is wrong.
Check the kit’s small parts and their positions before assembly. A missing spacer or reversed interface can alter how the foot bears on the roof. Keep left/right and front/rear items identified wherever the instructions distinguish them; visual symmetry does not establish interchangeability.
Choose the crossbars around the confirmed fit
The approved system determines which bar lengths and profiles you can use. A longer bar is not a way to compensate for mounting points that are narrow across the roof, and a lower-profile rack should not be substituted just to reduce height. Compare only options supported for the exact combination.
The physical space beneath each bar matters if the accessory clamp wraps around it. Check for feet, bases and roof surfaces that could obstruct the clamp or a bolt. A track-mounted carrier needs its own adapter verification, including the loading area allowed by the bar instructions.
Measure the spacing that the fixed points actually give you
Fixed locations can constrain the front-to-rear bar position. Use the complete rack instructions to establish any permitted adjustment, then measure between the crossbar centres using the accessory maker’s method. Do not assume a sliding slot in the box allows the vehicle feet to move.
Compare that measured spacing with the exact roof-box range. If a hypothetical rack is fixed at 980mm and a box permits up to 930mm, the figures do not overlap. Moving the feet away from their designated points or drilling the shell is not a solution. Confirm the measurement and seek an approved alternative or a box designed for the available arrangement.
Check hatch clearance at the same time. A long box can have a compatible spacing but still clash with the opening boot or spoiler. Our spacing guide and hatch measurement guide address those separate dimensions.
Follow the exact tightening and recheck sequence
Use the tools, settings and assembly order specified for the actual feet and kit. Different fasteners within one rack may have different instructions. Do not apply a single internet torque figure to all the bolts, and do not use a click from one tool as proof that every interface is correct.
Before loading, carry out the rack maker’s security and engagement checks. Confirm any glass-roof restrictions and the complete load allowance. The vehicle’s dynamic roof limit includes the rack and empty box; a rating printed for the foot pack cannot increase the car’s allowance.
For removal, follow the documented procedure and restore the vehicle’s mounting covers or protection as required. Store the exact fasteners with the labelled kit and inspect them before the next installation. A fixed mounting location makes repeat positioning easier, but does not remove the need to verify condition and secure assembly.
Components and guidance checked October 2026 using Evo Fixpoint information, its assembly booklet and the vehicle-specific selector. Use the actual car’s handbook and supplied kit instructions for installation.
Frequently asked questions
Does a small roof cover always hide a mounting point?
No. A trim detail is not proof of a load-bearing attachment. Confirm the location and opening method in the vehicle handbook before treating anything beneath it as a rack mount.
Can I choose a bolt by measuring the hole?
No. Correct thread size alone does not verify engagement length, seating, spacers, corrosion protection or load transfer. Use the exact approved fitting kit and its specified hardware.
Are fixed-point bars adjustable forwards and backwards?
The factory positions usually constrain the rack location; any available adjustment must be explicitly permitted by the system instructions. Do not assume the accessory slot allows the feet to move.
What if a mounting thread feels damaged?
Stop rather than forcing or re-cutting it. Have the vehicle mounting point assessed through the vehicle maker or a qualified specialist before fitting or loading a rack.
Does Evo Fixpoint include the vehicle fitting kit?
The selected four-foot listing is a foot pack, not an entire rack. Match the required vehicle kit and crossbars separately, and check the actual supplied quantity and model revision.