
Measurement guide / Roof bars and compatibility
Measuring Roof Box Clearance Above Your Boot and Rear Spoiler
Measure from the front crossbar to the hatch, compare model-specific clearance figures and check your boot, spoiler and box position before buying.
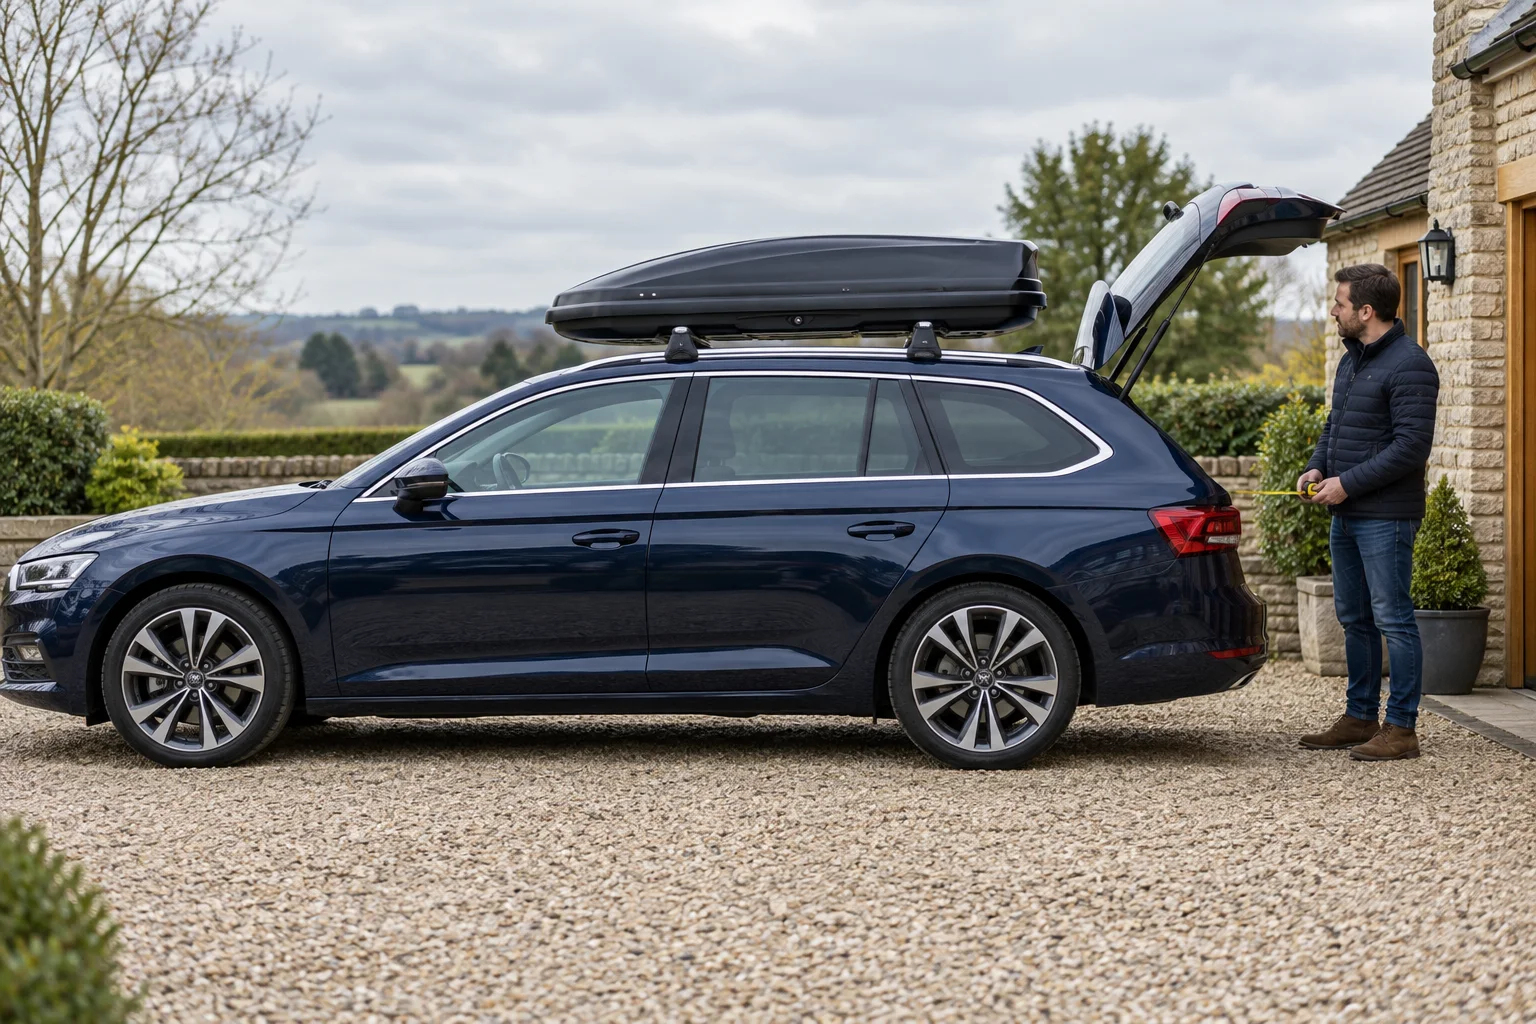
Measure from the correct front-bar reference
For Thule’s front-clearance method, measure from the centre of the front crossbar to the point where the roof meets the hatch. Your distance must be greater than the exact box’s listed figure. Then verify the real hatch and spoiler opening path, with the bars and box in permitted positions.
Understand why box length does not predict boot clearance
Two boxes of similar overall length can sit differently relative to the front bar. Their mounting ranges, clamp locations and rear profiles can differ. A shorter shell is therefore not an automatic solution to a hatch conflict, and the length of the painted roof is not the main reference for this check.
Start with a complete rack approved for the actual car and roof. Install or establish its bar positions according to the vehicle-specific instructions before measuring. If the bars are not yet fitted, obtain the documented reference positions or ask a fitter to establish the measurement; do not guess their likely location from a car photograph.
Keep the roof-box model code beside the tape measure. A range name such as Motion can cover several sizes and generations, each with its own front-clearance requirement. A figure for a different shell can give false confidence even when the name and colour look familiar.
Establish the front-bar and hatch references
Thule’s published method uses the centre of the front crossbar and the point where the roof meets the hatch. Follow the maker’s diagram to identify the roof-to-hatch junction. The end of a closed spoiler, the rear crossbar and the windscreen are different reference points and should not be substituted.
Measure the longitudinal distance along the car as the diagram specifies. Keep the tape aligned rather than taking a diagonal across the roof. Work from stable ground with suitable help or access equipment where needed; do not stand on the car or lean against roof glass to reach a reference.
Record the distance in millimetres and check it again. If it is close to the box’s minimum reference, uncertainty in the bar centre or tape alignment matters. A measurement that changes by several centimetres between attempts needs resolving before it is used to choose an expensive shell.
Compare the exact model figures
| Selected UK model | Front-clearance reference R min | Other relevant constraint |
|---|---|---|
| Force 3 L Sport / 645600 | 1265mm | Approved mounting and bar positions still required |
| Motion 3 Sport / 639600 | 1244mm | Check its exact mounting range and hatch path |
| Motion 3 XL / 639800 | 1324mm | Longer shell needs its own clearance check |
These are model-specific figures from the current fitting tables, not measurements from our generated photographs or a guarantee for every car. Thule’s method calls for a measured distance greater than the listed value. Treat an equal or borderline figure as unresolved rather than rounding it upwards into a pass.
A hypothetical 1300mm vehicle measurement is 56mm greater than that Sport reference, but 24mm short of the XL reference. That arithmetic helps compare candidates; it is not the completed fit approval. The real opening path, correct mount engagement and all rack restrictions still need checking.
Check the clearance reference with the measurement uncertainty
A nominal measurement just above a model’s reference may not remain above it when the measurement is uncertain. The useful comparison is between the lowest credible vehicle reading and the exact reference, using the same measurement method.
Inputs and assumptions. Model references are 1265mm, 1244mm and 1324mm. Vehicle readings and uncertainty bounds below are fictional worksheet inputs. The zero-bound row illustrates exact arithmetic only; it is not a claim that a real measurement has no uncertainty.
| Model | Assumed vehicle reading | Assumed uncertainty | Assessed lower reading | Reference excess | Reference screen only |
|---|---|---|---|---|---|
| Force L Sport 645600 | 1300mm | 10mm | 1290mm | 25mm | Greater than reference; verify full fit |
| Motion Sport 639600 | 1300mm | 10mm | 1290mm | 46mm | Greater than reference; verify full fit |
| Motion XL 639800 | 1300mm | 10mm | 1290mm | -34mm | Not greater; do not rely on this candidate |
| Force L Sport 645600 | 1290mm | 30mm | 1260mm | -5mm | Not greater; do not rely on this candidate |
| Motion Sport 639600 | 1290mm | 30mm | 1260mm | 16mm | Greater than reference; verify full fit |
| Motion XL 639800 | 1290mm | 30mm | 1260mm | -64mm | Not greater; do not rely on this candidate |
| Force L Sport 645600 | 1324mm | 0mm | 1324mm | 59mm | Greater than reference; verify full fit |
| Motion Sport 639600 | 1324mm | 0mm | 1324mm | 80mm | Greater than reference; verify full fit |
| Motion XL 639800 | 1324mm | 0mm | 1324mm | 0mm | Not greater; do not rely on this candidate |
At a recorded 1290mm with a 30mm uncertainty bound, Force Sport’s apparently positive nominal excess becomes −5mm. Motion Sport retains a 16mm numerical excess under the same assumed lower reading. Neither result certifies the real hatch path.
An exact 1324mm reading is not greater than Motion XL’s 1324mm reference. Do not round a model reference down, average conflicting measurements or borrow another box’s threshold to turn a marginal result into approval.
Calculation method and sources
Assessed lower reading = recorded vehicle distance − its declared uncertainty. Reference excess = assessed lower reading − model reference. The published product-page wording requires a distance greater than the reference, so zero is not greater. A positive value is only this reference screen; it does not assess hatch movement or complete fit.
- Force 3 L Sport 645600: Rounded 63cm shell width and 175cm ski maximum; use 15.4kg from the manual for mass planning.
- Motion 3 Sport 639600: 15kg page mass, 175cm ski maximum and model-specific hatch reference.
- Motion 3 XL 639800: Standard-height XL; 200cm ski maximum. Planning mass is 23.2kg from the manual.
- Force 3 family instructions: PDF pages 14–15: dimensions, spacing, mass and contents limit; model labels must match.
- Motion 3 family instructions: PDF pages 14–15: exact Sport, XL and XL Low rows; maximum dimensions do not describe the whole packing envelope.
Download the inputs and workings (CSV). Source review: October 2026.
Inspect the spoiler and the whole opening arc
A hatch-mounted spoiler moves as the boot opens. Its closest approach to the box may occur partway through the movement, not with the hatch fully shut or fully open. Rear glass, hinges, trim and box contours also belong in the physical assessment.
Do not use a powered tailgate to discover an uncertain collision. Establish the likely envelope from the vehicle and box guidance, then follow any permitted fitting or clearance-check procedure. Keep hands away from pinch points and stop before contact; get fitting assistance where the path cannot be assessed confidently.
A large spoiler or unusual hatch design deserves particular attention even when the published front-clearance comparison looks favourable. The manufacturer’s method is an important screening check, but the complete arrangement must remain clear in the actual permitted operation.
Check the Force example separately from Motion
The 21mm difference between these two Sport examples is small enough to matter on a marginal setup. Do not select by overall length or round both references to “about 1.25m”. Retain the exact published figure and a careful vehicle measurement, then leave the physical clearance assessment to the actual permitted assembly.
Other constraints can decide the purchase even when the hatch measurement favours one box. The bar spacing, clamp profile, usable luggage shape and remaining roof allowance can still rule it out. Work through the full fit checklist before settling on the shortlist.
Make adjustments only within both sets of instructions
Some racks allow longitudinal adjustment; others prescribe fixed positions. Moving bars forward can increase the front-clearance distance, but only if the vehicle and rack instructions permit that position. Fixed points and door-aperture kits should not be moved just to make a box appear to clear.
The shell may also have a permitted adjustment range relative to the bars. Any new position must retain correct engagement of all mounts, required support and the specified spacing. Do not push the box beyond a mounting-slot limit or allow an obstructed clamp to close partly over a foot.
After an approved change, repeat the spacing, mount, load, roof and hatch checks. A single successful clearance measurement does not remain valid after moving the front bar or changing an adapter. Record the final permitted arrangement, not the most generous measurement from a temporary trial.
Compare a larger box against the measured space
If a candidate fails, consider another shell with a supported arrangement rather than disabling the boot or improvising a restraint. A powered opening limiter is not automatic manufacturer approval and can be reset or overridden. Ask the relevant maker if a restricted opening is being proposed as part of a documented solution.
For family travel, full usable boot access can be valuable at stops. Think through retrieving a pushchair or overnight bag with the actual carrying setup in place. A box that adds litres but makes essential luggage difficult to reach may be the wrong practical choice even after the formal fit checks pass.
Keep a measurement record for installation day
Record the car and roof version, complete rack codes, approved bar positions, centre-to-hatch measurement, exact box model and its reference figure. Add any manufacturer advice about the opening path. This lets you check the delivered equipment against the plan and repeat the assessment if the setup changes.
Before travel, verify secure mounting, luggage restraint, closure, load and total height according to the instructions. Revisit hatch clearance after any approved repositioning or replacement rack component. The bar-spacing guide covers the other longitudinal measurement that commonly affects these decisions.
Figures checked October 2026 against Thule’s hatch-clearance method, Force 3 fitting table and Motion 3 fitting table. Confirm the supplied model and current instructions before purchase.
Frequently asked questions
Where do I start a Thule front-clearance measurement?
Use the centre of the front crossbar and the roof-to-hatch junction specified in Thule’s method. Do not substitute the windscreen, rear bar or the end of the closed spoiler.
Does matching the minimum figure count as a pass?
Thule’s published method says the measured distance should be greater than the listed figure. An equal or uncertain measurement is not a comfortable pass; resolve tolerances and the actual opening path.
Can I move the bars forward to clear the spoiler?
Only if the vehicle-specific rack instructions permit that new position. Recheck bar spacing, accessory engagement, roof restrictions and all other clearances after any approved adjustment.
Does a shorter box always leave more boot clearance?
No. The mounting range and distance behind the front bar matter, as well as the overall shell length. Compare the exact model’s front-clearance requirement and permitted positioning.
Can I rely on a powered tailgate opening limiter?
A limiter setting does not establish approval for a conflicting setup and may be reset or overridden. Resolve clearance using the vehicle and box instructions or documented manufacturer advice.