
Identification guide / Roof bars and compatibility
Raised Rails vs Flush Rails: Identifying Your Roof Type
Identify raised rails, flush rails, fixed points and a bare roof. Match your exact car to approved feet and kits before choosing crossbars.
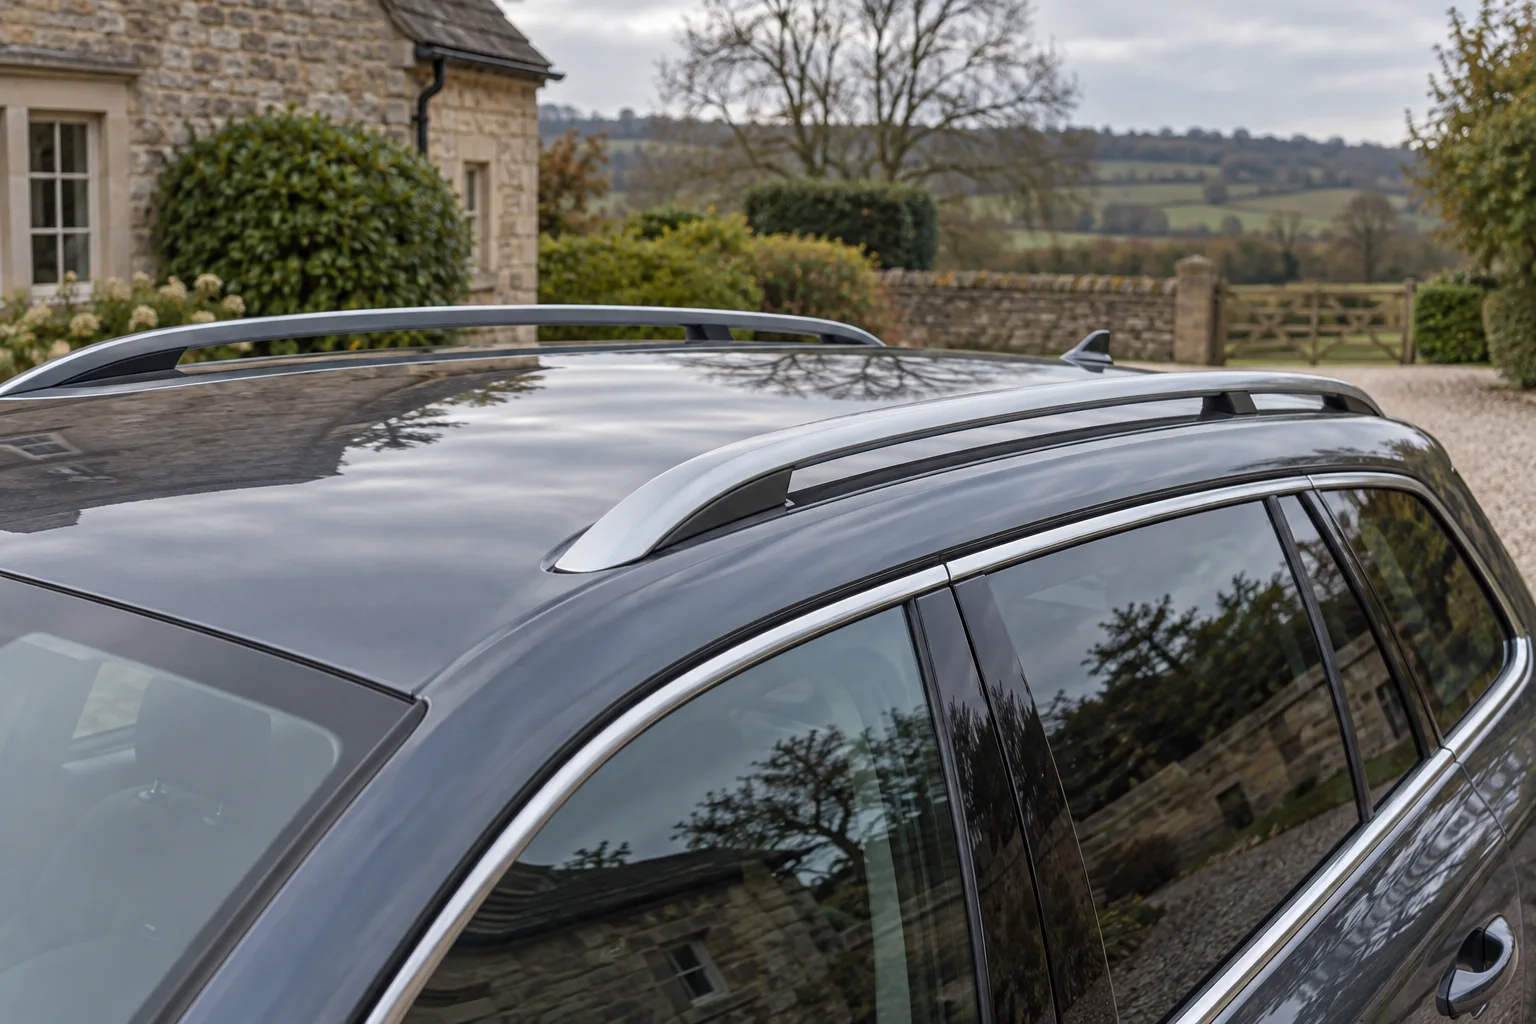
Identify first, then verify
Raised rails have an open gap beneath them; flush rails sit close against the roof. That distinction helps you start the right fit search. The exact car, rail shape and manufacturer-approved combination still determine which feet, kit and crossbars you can use.
Distinguish rails from the bars that carry the box
Roof rails normally run front to back along the car. Crossbars run from side to side and support the box or sports carrier. The words are sometimes mixed in retailer titles, so inspect what the listing actually contains. A car with factory rails usually still needs compatible crossbars before a conventional box can be mounted.
Begin beside the parked car in good light. Compare the physical roof with the handbook’s roof-carrier information and the rack selector’s illustrations. Note whether the rails are factory equipment and whether the actual roof matches the configuration you are selecting. A decorative trim strip or aftermarket styling rail should not be treated as a load-bearing attachment without confirmation.
The purpose of this identification exercise is to choose the correct branch of the fit search. It cannot tell you the permitted load, bolt size or clamping method. Keep those questions for the exact vehicle and system instructions rather than trying to infer them from the height of the rail.
Recognise a raised rail by the open gap
A raised rail bridges over the painted roof, with visible space underneath for part of its length. Its supports meet the car at particular locations. Looking across the roof from the side often makes that gap easier to see than looking straight down from above.
Record the shape and any manufacturer-designated fitting areas, but do not assume the entire rail is an available clamping surface. Rail curvature, cross-section and support positions can affect the approved foot and mounting location. Two raised rails can look similar while accepting different systems.
Some approved raised-rail systems combine their attachments without a separate vehicle kit. That is a package detail to confirm, not a general rule that all raised rails need the same feet. Read the maker’s complete parts list and any rail-size or positioning restrictions before ordering.
Recognise a flush rail without mistaking trim for structure
A flush rail follows the roof closely, without the obvious open gap associated with raised rails. Its approved attachment may engage a shaped edge, recess or other specified feature. The correct interface can be difficult to judge from a retailer’s distant photograph.
Do not probe beneath a flush rail with tools or use a generic clamp intended to wrap under a raised rail. Check the handbook and selector for the actual rail design. If the description remains ambiguous, take clear reference photographs for the manufacturer or fitter and provide the vehicle details; do not force an identification by testing whichever foot happens to be available.
A flush-rail kit can be specific to the profile and attachment points of that car. A used kit from a related model needs the same full verification as a new one. Check part identifiers and the instructions, particularly if pads or brackets have been separated from their labelled positions.
Rule out fixed points and a genuinely bare roof
A car without visible longitudinal rails may still have designated factory points beneath covers. Those are a different route from a door-aperture clamp system. Open only the covers identified by the handbook and use the specified method; small trim details are not evidence of a threaded rack mount.
If no rails or documented points are present, look for an approved naked-roof system for the exact body and roof. Some vehicles will have no supported solution. The absence of rails does not create permission to clamp anywhere around the door opening or install a universal rail retrofit.
| Roof appearance | Likely starting point | What still needs confirmation |
|---|---|---|
| Longitudinal rail with visible gap | Raised-rail fit search | Rail profile, feet, bar length and permitted locations |
| Longitudinal rail close to roof | Flush-rail fit search | Exact interface, kit, feet and restrictions |
| Designated covers over factory mounts | Fixed-point fit search | Handbook location and exact vehicle kit |
| No visible rails or documented points | Naked-roof fit search | Whether a clamp system is approved at all |
Check the exact configuration in the fit selector
Enter make, model, generation, body and year, then select the roof configuration you have identified. Read all notes rather than stopping at a headline recommendation. Glass roofs, factory rack options and unusual body versions can lead to separate results or exclusions.
Save the complete result with the bar lengths, feet, kit and relevant instructions. Compare any retailer bundle against every part on that list. A bundle named after your car can still refer to another body style or roof option; a family name on the box does not resolve that difference.
If you are changing cars, run a new selection from the beginning. Even when the new car also has raised rails, the bar length, foot compatibility or permitted load may change. The value of a modular system is the possibility of reusing approved parts, not an assurance that the previous rack moves over unchanged.
Compare a complete rail-roof alternative
Some products combine bars with their rail attachment rather than selling a separate four-foot pack. That can simplify the basket, but the actual vehicle and rail application still controls the fit. Look at the selected variant and its own instructions, not a similar model’s advertising photograph.
Compare usable mounting width as well as overall bar length. Feet can occupy space needed by the box clamps, and a low-overhang arrangement can offer less room for a bike alongside a box. Follow the approved loading areas rather than treating every visible centimetre as usable.
Finish with accessory, load and clearance checks
Identifying the roof settles only the first connection. Next confirm that the box or sports carrier accepts the selected crossbar profile, mounting width and spacing. A roof box does not normally attach directly to longitudinal rails, and a T-track channel does not establish that every adapter fits it.
Include the entire rack and carriers in the vehicle’s roof-load calculation. Check any lower limits imposed by the feet or kit, then compare the remaining allowance with the intended luggage. Finally assess hatch clearance, total height and any roof-glass restrictions. Our complete compatibility checklist puts those later checks in order.
Identification and packages checked October 2026. Primary references: Thule raised-rail feet, flush-rail feet, vehicle selector and Menabò Tiger Silver. The actual handbook and fit instructions determine the installation.
Frequently asked questions
What is the clearest sign of a raised roof rail?
A visible open gap between the longitudinal rail and the roof is a useful identification clue. It starts the fit search but does not establish the correct feet or load allowance.
Are flush rails the same as fixed points?
No. Flush rails sit close to the roof along its length; fixed points are designated attachment locations. Some designs combine features, so use the handbook and exact manufacturer fit result.
Can raised-rail feet grip flush rails?
Do not substitute them on appearance. The approved grip surfaces, pads and attachment method can differ; use only the complete combination specified for that vehicle and roof.
Are factory rails enough to mount a roof box?
A conventional roof box needs approved crossbars and compatible mounting hardware, not just longitudinal rails. Check the vehicle, rack and box instructions before assembling the carrying system.
What if my roof does not match the selector pictures?
Check the handbook and actual roof specification, then ask the rack maker or a fitting specialist with the exact vehicle details. Do not select the nearest-looking roof just to obtain a kit number.